

Serves 1
Alternative Ingredients are listed in Red
|
|
|
| Home | Accessories | Brines | Cook Times | Dictionary | Egg Wash | Frosting | Measures | My BBQ | Sauces | |
|
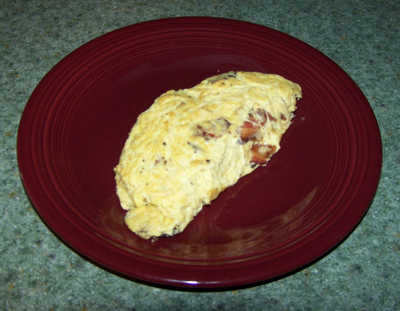
Pillow Omelette Serves 1 Alternative Ingredients are listed in Red |
| Qty | Size | Ingredient | This recipe is more about technique than ingredients. I learned this method of cooking omelettes at a hotel in Salt Lake City, Utah, in the 70's. I have never seen it used anywhere else since. Not that it isn't done, it's just so uncommon that I have yet to see anyone else do it this way. It takes a little practice to get it right (which may be the reason why), but it's worth it. This technique makes the largest, fluffiest and most delicious omelettes I have ever eaten. Bon Appétit. | |
| 3 | med | Chicken Eggs | ||
| 4 | oz | Premium Olive Oil | ||
| Peanut Oil | ||||
| Canola Oil | ||||
| 3 | oz | (ingredients)* | ||
| 3 | oz | (cheese)* | ||
| 1 | 9" | Omelette Pan* | ||
| 1 | 9" | High Temp Spatula | ||
| 1 | Electric Blender | |||
|
Set out your eggs ahead of time. They should be acclimated to room temperature before you begin to cook. We don't want anything to cool the hot oil unnecessarily. Use the freshest eggs you can. Yes, they will taste better of course, but more importantly, "cold storage eggs" soak up water with time . . . and water is the nemesis of omelette pans using such a high heat technique. The eggs will stick with a voracity the likes of which you will dread. Scrubbing a non-stick pan is no fun and potentially harmful to the pan . . . and scrubbing out a stainless or aluminum pan is reserved only for punishment. Avoid moisture. This includes adding milk to the eggs. Milk is 85% water! Mise en place: Prepare all of your "ingredients" ahead of time and place them into a small single bowl, ready to dump into the pan post haste. Have your cheese prepped and ready to apply to the omelette as soon as it is done. Time is of the essence here, you've got a done omelette in a very hot pan, thirty seconds can mean the difference between the perfect omelette and a trivet! Put your eggs in the blender and blend. This will saturate the eggs with air, a critical element to this process. This should only take a few seconds. You could also use a stick blender, a food processor or even a mechanical egg beater. Anything that will put a lot of air into the eggs. Unless you got an incredible arm, a whisk or fork just isn't going to cut it. Once one is more proficient at this technique, you can perform this step while the pan is heating up. For now, don't worry about the eggs deflating while they sit waiting for the oil to heat up. The disaster you are about to create for your first attempt will cover any inadequacies in the eggs. Put the oil in the pan and set your burner to high. And leave it on high. At this point you better not have anything else to do but watch that pan. The very moment the oil starts to smoke, dump the eggs into the pan, followed immediately by dumping the ingredients in, and then shake like crazy! After you flip the omelette, kill the heat. The heat that already exists in the egg, oil, pan and stove top, will carry you through to perfection. Technique Explained: You will need to know how to flip your omelette and how to "...shake like crazy!". The "shaking" technique is a somewhat violent circular motion, elliptical actually. So that the cooking egg both rotates in the pan (the circular) and gets thoroughly mixed up (the back-and-forth). You add circular and back-and-forth together, you get elliptical. It's not unlike Cleavon Little's gun skills in Blazing Saddles. The idea being, to expose every molecule of egg to every molecule of hot oil as quickly as possible, thereby cooking the eggs to perfect doneness in just a matter of seconds. Since the oil and pan are so hot, it is imperative that you keep the eggs moving, not just in the pan, but amongst itself as well. If the egg merely slides around and round in the bottom of the pan then the egg that is touching the pan is going to burn. Basically, you need to keep the eggs moving until they are done. On steaks, brown is good, on omelettes, not so much. As the egg cooks, it will have a tendancy to stick to the upper edge of the pan. Remember, you don't want any egg sitting in one place for any length of time. Keep it movin'. That's what the spatula is for. Use it to peel the egg from the rim so it combines with it's brethren. With practice, you will be able to "sweep" this skirt of egg from the edges with the shaking of the pan and forgo the spatula. At this point you probably have a half cooked omelette (the bottom half) and a puddle of uncocked egg on top. Now is the time to flip it, without hesitation. For every second the cooked egg sits on the bottom, in the hot pan, are seconds that will be burning the surface of the omelette. You can use the spatula to turn the omelette over in the pan, or you can flip it like a pancake. "Ya. Right! Like that's gonna happen." Well, you need to learn. Flipping it with the spatula really doesn't work very well. But if you can't flip, you really don't have much of a choice. Don't worry about "ruining" the omelette. As long as you don't burn it, it will still be a tasty omelette . . . it just won't look pretty. And of course you can cover a lot of mistakes with enough cheese. You can practice flipping omelettes (or pancakes or anything else) by flipping a hot-pad (the classic, square, quilted type - preferably one with a little heft to it). Do I have to mention "in a cold pan"? No? Good. Moving on... Then there's the dreaded grease-ball. That's what you will get if the pan and/or oil is not hot enough. You want to use an omelette pan with some meat to it. When you first dump the eggs into the oil it's going to cool the oil off. But if you have a good, hefty pan, it will be able to put a lot of heat right back into the oil and eggs. And of course you have the burner on as high as it will go to help with this. But if this happens to you, don't despair (well, maybe a little). If you feel you need to salvage this, use a paper towel to dab the excess oil from the omelette (after it's on the plate, but before you apply the cheese). Or, just throw it out and try again. * Ingredients:
  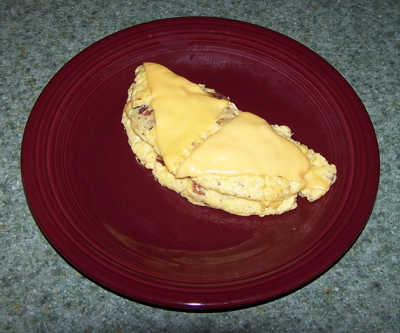 Note: Once you place the omelette on the plate and have dressed it, place the still quite hot omelette pan upside down over the plate, covering the omelette. This will speed up the melting of the cheese and put a sheen on it. (make sure the hot pan doesn't come in contact with any food on the plate) 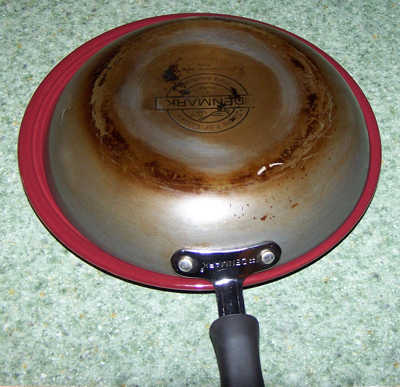 |
||||
 |
||||